How to make an animated GIF from a stereograph
Posted on 07 September 2015 by Thomasin
Stereographs were a type of photograph popular in the nineteenth and early twentieth centuries. They were initially created by taking a photograph, slightly shifting the camera, and taking another photograph of the same scene. When viewed through a stereoscope, a special device for viewing these images, the two photographs create the illusion of depth. Today, we can recreate the trompe l’oeil 3D effect of the stereoscope by creating simple GIFs.
1. FIND A COPYRIGHT-FREE STEREOGRAPH
Before making our GIF, we need to make sure the stereograph we are animating is copyright-free. Using search services such as DigitalNZ, the Digital Public Library of America, Europeana, and Trove, are easy ways to access copyright-free photographs, videos, and huge range of other material. These services will also allow you to search by usage, so you know that you are only returning results which can be changed and edited.
For example, on digitalnz.org, click the 'Usage' tab, and then click 'Use Commercially' to return remixable results:
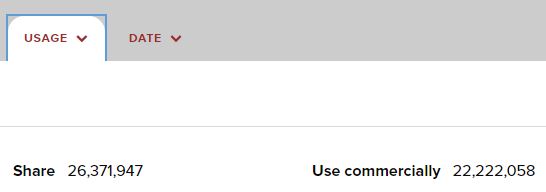
Put ‘stereoscopic’ into the search box and you can select your favourite from the stereographs returned. You’ll need to select a stereograph with two small images right next to each other.
2. DOWNLOAD YOUR IMAGE
Once you've found a reusable image you'd like to work with, click through to the collection it is part of and download your selected image. Save it to your desktop. For example, this image from Auckland Libraries:
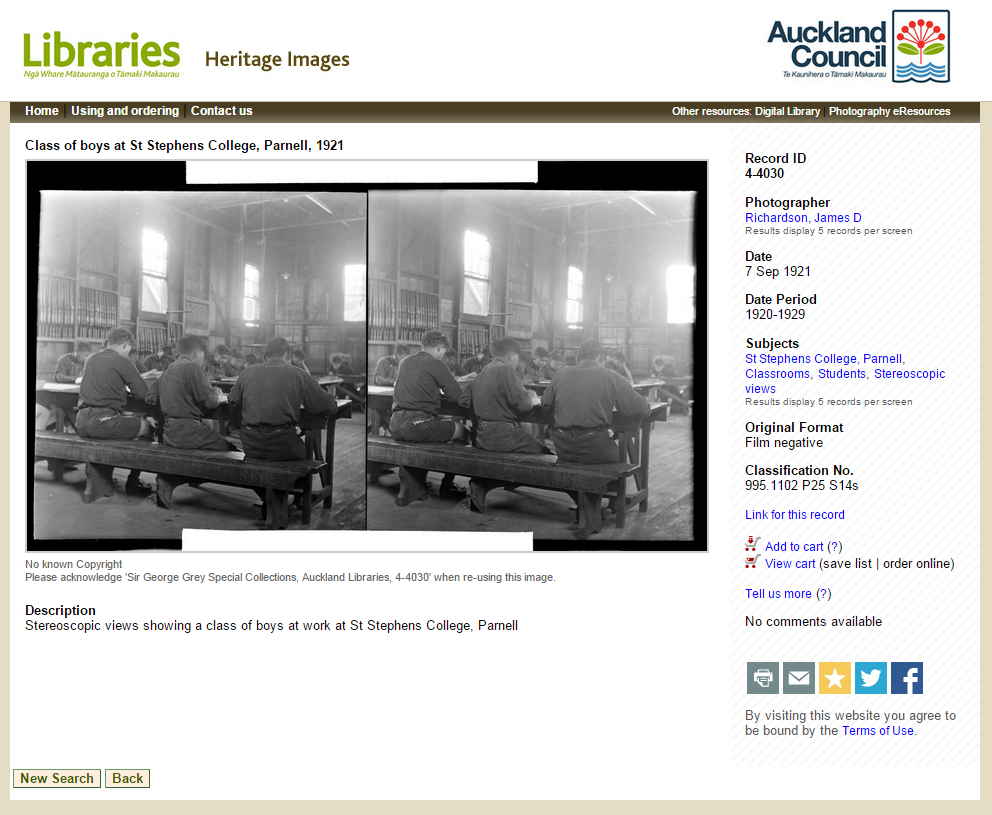
NOTE: Take note of the licence information on this page, we can only use material which is:
- ‘no known copyright’,- has a Creative Commons license,- or is in the public domain.
NOTE: Take note of the attribution information too. When reposting or sharing our GIF we must include the correct attribution of the source material to Auckland Libraries. This can be easily copied and pasted from underneath the image:
Sir George Grey Special Collections, Auckland Libraries, 4-4030. No known copyright.
Create a folder on your desktop, titled for your GIF, and save this image inside.
3. EDIT YOUR STEREOGRAPH WITH PIXLR
We are going to use this free in-browser editor to edit our image: https://pixlr.com/editor/
Click ‘Open image from your computer’ and upload your Auckland Libraries stereograph.
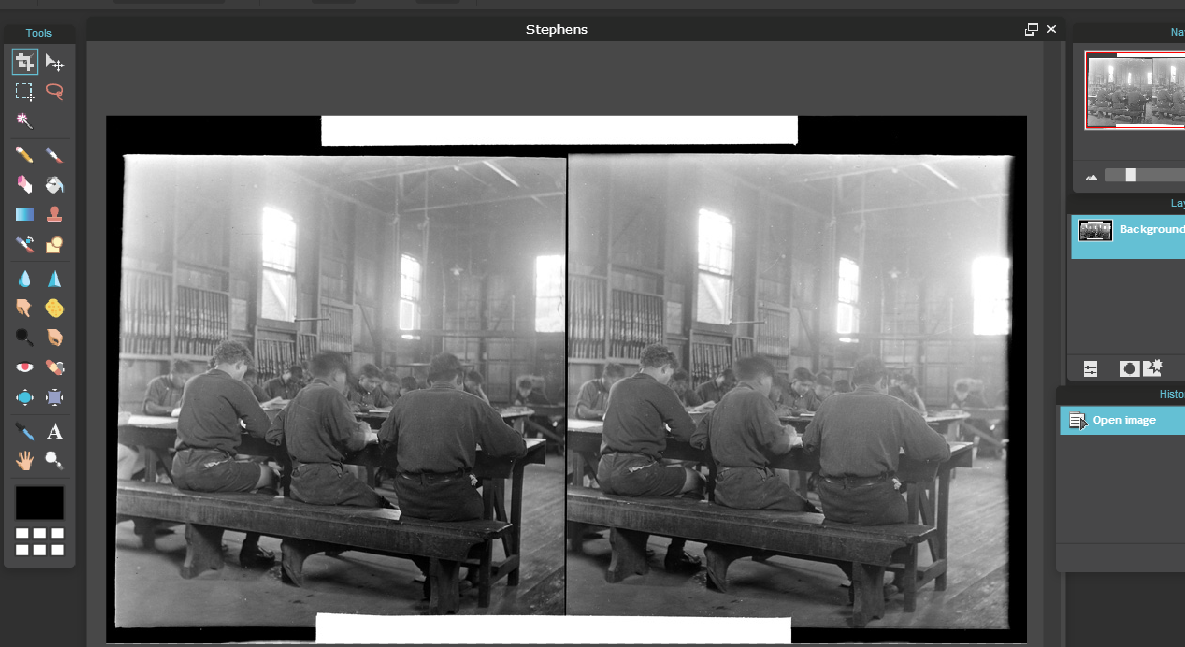
To make our stereograph create the 3D effect, we need to make sure these two images are as closely aligned as possible.
Press CRTL+A to select the whole image, and then CRTL+C to make a copy of the two images.
Now we split our image into two. Select the crop tool:

Draw a box around the right-hand image and crop it.
You will now have the right-hand side of the stereograph.
Click on ‘File’ in the top menu and save your image on your desktop.
NOTE: Make sure you move the ‘Quality’ slider to full quality, or approximately 100 KB, if possible.
We need to place the other side of the stereograph on top of this one, so that we can check whether they are aligned. To do this we need to create another layer.
On the right-hand side of the screen, double-click the small padlock symbol next to your ‘Background’ layer. A tick box will appear and the name will change to ‘Layer 0.’
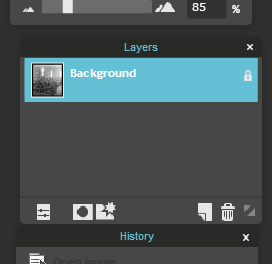
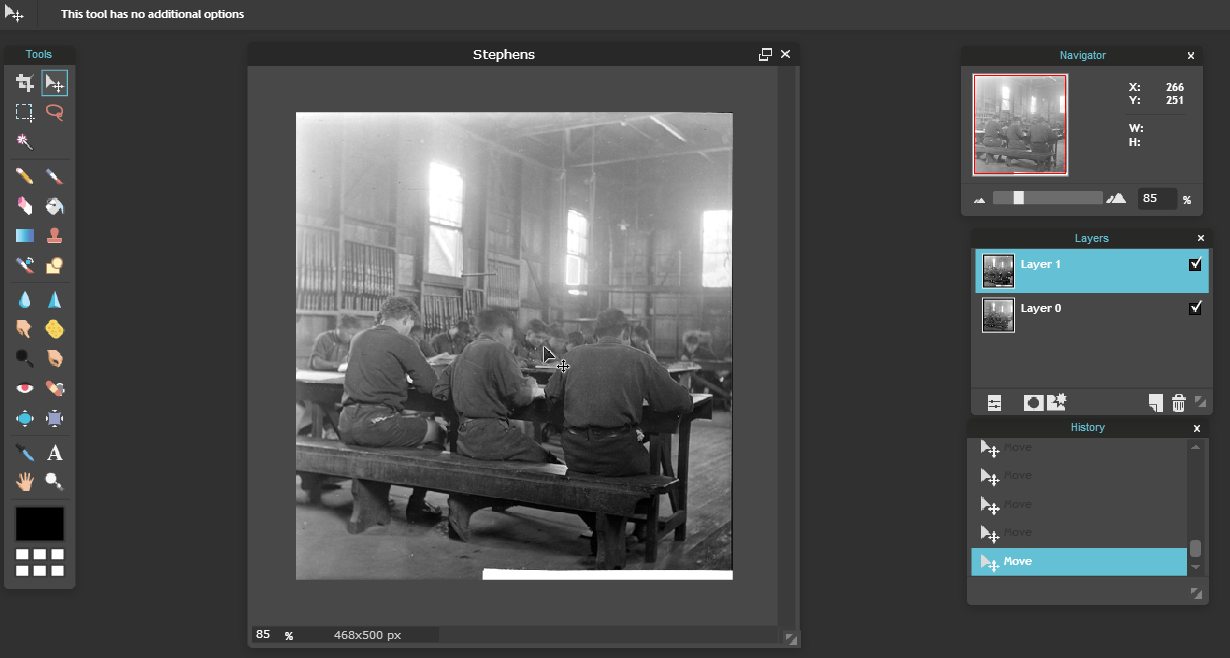
Click back on your image and press CRTL+V to paste the original image on top. The left hand image will appear on top of the right hand image. You should now have two layers:
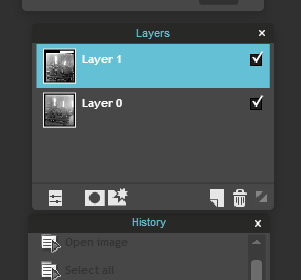
Click on the Move tool:

Returning to the image, move the layer on top so that it aligns with the outside frame.

You need to check that your images are as closely aligned as possible.
You can switch between the two layers by quickly clicking the first layer on and off. You’ll see the change between the two images, and see whether the 3D effect is appearing. Try clicking on the tick for ‘Layer 1’ and see what happens:
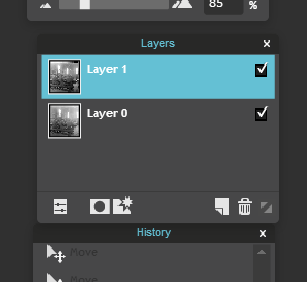
You’ll soon get a sense of where you need to move your top layer. Making sure the box is ticked on ‘Layer 1’, use the arrow keys on your keyboard to move the top image around. Once you’ve moved it, check how the stereograph is appearing by clicking ‘Layer 1’ on and off again.
Repeat this process until you have created a convincing 3D effect that is true to the original stereograph. Go to step four if you are happy, or try the advanced option below.
ADVANCED OPTION
TIP: Those who are more comfortable with image editing can use the opacity slider to check their images are aligned. Make sure you are editing ‘Layer 1’, then click ‘Toggle layer settings’ underneath the layers:
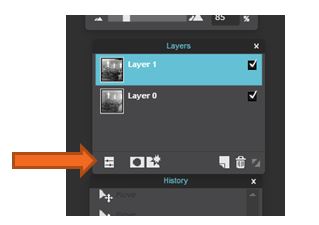
Now you can use the slider to change the opacity on ‘Layer 1’ so that you can see both images.
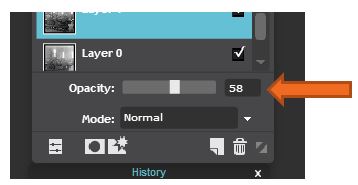
Select a focal point on your image, and move ‘Layer 1’ until it aligns at one focal point with ‘Layer 2’. Your image should still look a bit blurry, something like this:

Once you’re happy with the match, return to the Layers menu, and pull the opacity back to 100%:
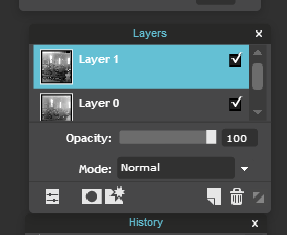
Click ‘File’ and save your new image on your desktop, ‘Stephens2’.
Now we have the two images, we can put them in a GIF generator to see how the stereograph looks.
4. ANIMATE YOUR GIF
We are going use a free in-browser tool to animate our GIF.
Go to: http://www.myspacegens.com/handler.php?gen=animatedimage
Select your size and speed. Make sure the ‘Prevent my pictures…’ box is checked.

Click ‘Add’ to select your two images, and then click ‘Upload’. If this doesn’t work click ‘’Don’t see anything below. Click here’ for a simpler upload tool. Then click ‘Submit’ to see your GIF.
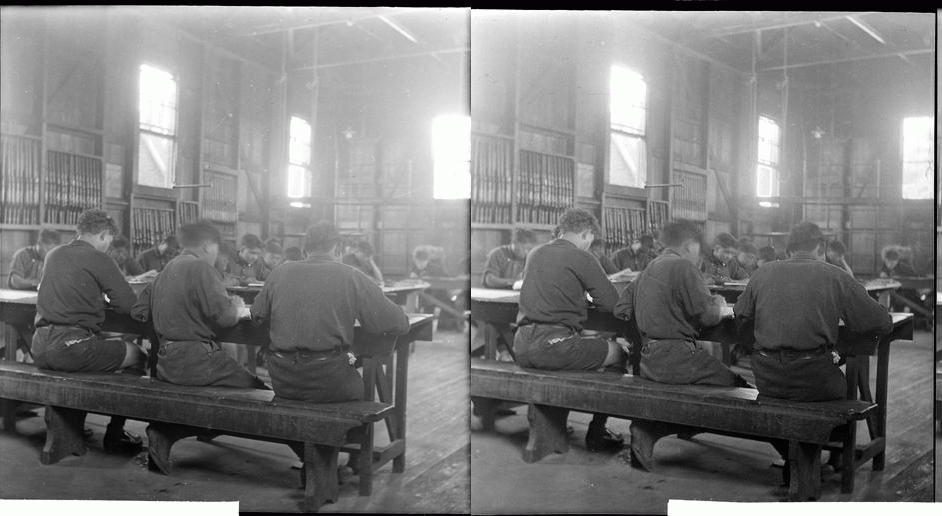
Click ‘Download this GIF’ to save your GIF. Or, simple right click and ‘Save image as’.
NOTE: When reposting or sharing our GIF we must include the correct attribution of the source material to Auckland Libraries. This can be easily copied and pasted from underneath the image:
Sir George Grey Special Collections, Auckland Libraries, 4-4030. No known copyright.
5. COPYRIGHT-FREE STEREOGRAPHS
Here are some more collections with copyright-free stereographs to get you started:
We've turned off comments here, but we'd still love to know your thoughts. Visit us on our Facebook Page @digitalnz or on Twitter @DigitalNZ to share any ideas or musings with the DigitalNZ team.