How to upload your own images to stories
This page includes instructions about how to upload your own images to a DigitalNZ story, where they will appear alongside items available on DigitalNZ.
How to get started
You can upload any image that helps tell your story. You can upload images directly from your phone's image library, or scan or photograph hard copy photos that are sitting in a shoebox at the back of your cupboard.
Start by logging in to DigitalNZ, or sign up to create a new account.
Make a story
Collect together interesting items for your 'story'. See this guidance on how to make a story.
Upload and describe your own image
Go to your 'story' page and click the 'Upload your own images' button in the centre of the screen.

You'll be guided through the following steps.
Drag and drop an image, or click 'Browse images on your device' to select a file from your device.
Give your image a title and description. These are required for you to complete your upload.
Select a licence or usage statement so that other people know how they can use your image.
Read and agree to our contributed content terms of use.
Your new image will appear at the top of your 'story'.
Add or edit the information about your image
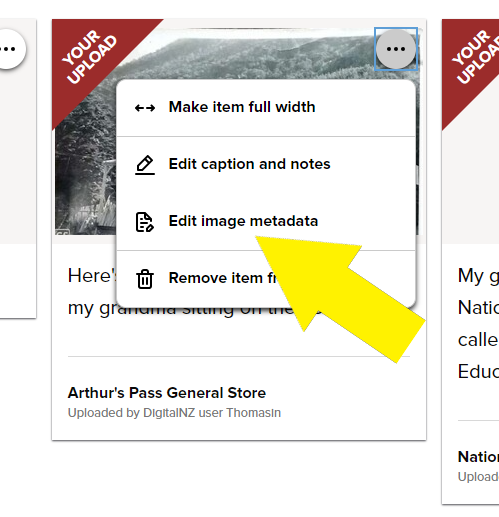
You can add more information about your image. From your 'story' page, click on the three dots icon on the top right of one of your uploaded images. Then click on 'Edit image metadata'.
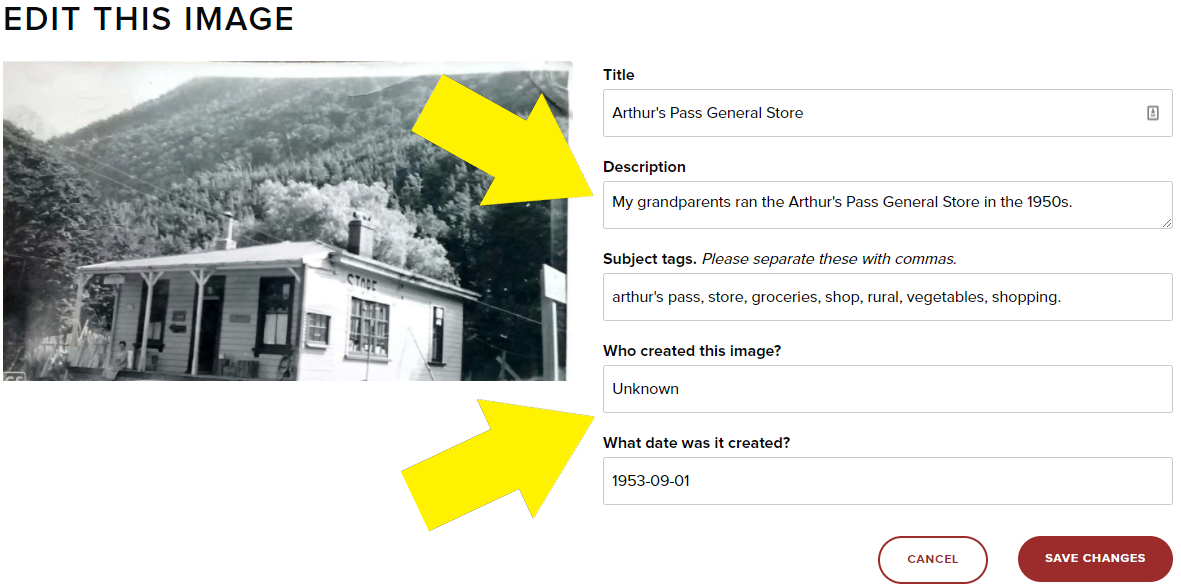
On this page you can change the image's title and description and add further information. Click 'save changes' when you are finished.
Add a caption and notes
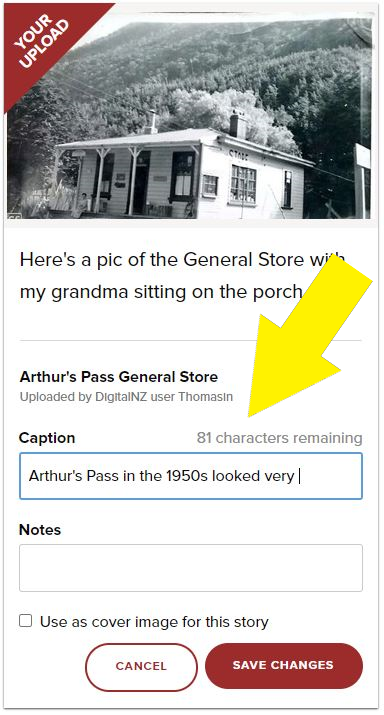
On your 'story' page you can add a caption or notes to your image. Click on the three dots icon on your uploaded image, then click on 'Edit caption and notes'.
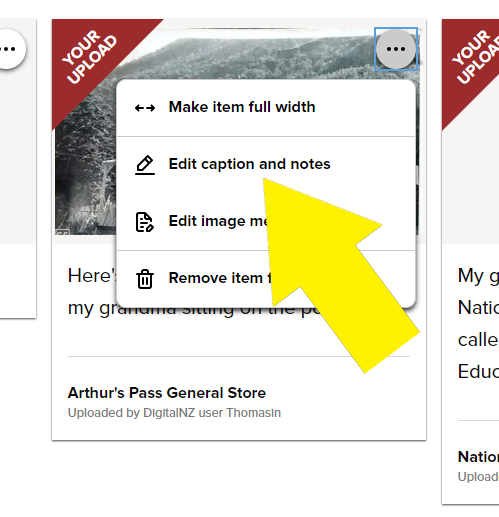
Fill in the 'caption' and 'notes' fields underneath your image. Click 'save changes' when you're finished.
Delete your uploaded images from your story
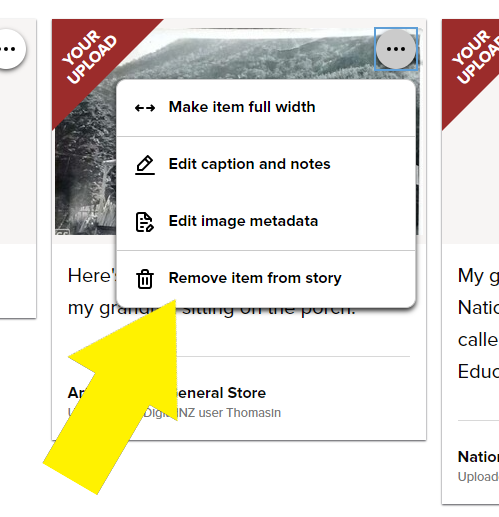
Click on the three dot icon on the top right-hand of your uploaded images. Click 'Remove item from story'. This will remove the image for your 'story' but it will still be available under 'My uploaded images', should you want to add it to another 'story'.
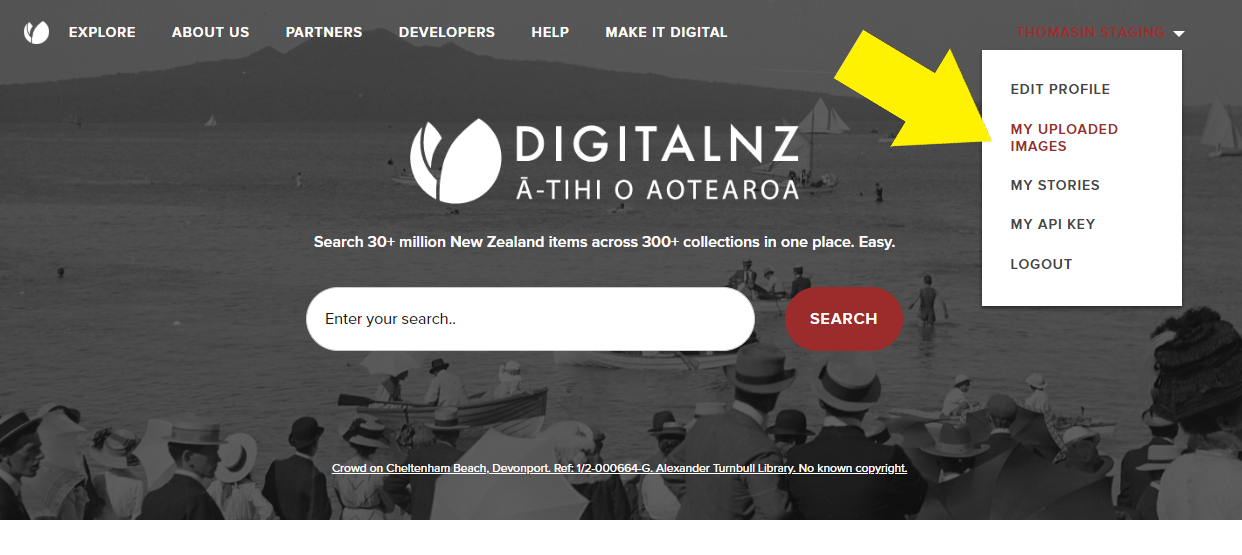
See all your uploaded images
You can see all the images that you've uploaded by clicking the drop-down menu in the top right-hand corner and clicking 'My uploaded images'.
